A Synology recycle bin is a common feature that seems easy to use and manage at first glance. However, recycle bins tend to occupy excessive space. And not all shared folders need a recycle bin. Note that Synology Drive has its own recycle bins, separate from the default ones. Which should you use when, and does emptying one empty the other?
Exploring Synology Recycle Bins
A recycle bin is a dedicated folder where deleted content is temporarily stored. It is possible to retrieve deleted data from the recycle bin. You can empty the recycle bin, after which the earlier deleted data is permanently removed and unretrievable without a backup.
Each recycle bin is linked to a folder. On a Synology NAS, a recycle bin can be linked to two types of folders:
- shared folder
- team folder
A team folder is a shared folder that you make accessible through Synology Drive. You must install the Synology Drive Server package on your Synology NAS to create team folders.
Below, I discuss both types of recycling bins and their characteristics. This will help you decide when to use which type and how to manage the recycle bins.
Questions to address are:
- how to enable a recycle bin?
- how to empty a recycle bin?
- how to restore data from a recycle bin?
- when to enable a recycle bin
- which recycle bin type to use, either one, or both?
Recycle bins are a great feature, but they have one disadvantage. If you do not manage them properly, they can fill up with files no longer in use, eating up valuable disk space. I discuss how to empty a recycle bin later in the post.
When to enable a recycle bin
Not every shared folder or team folder needs a recycle bin. Sometimes, a recycle bin can be counterproductive.
Do not use a recycle bin for folders with the following contents:
- backup files, like from Active Backup suite, Hyper Backup, rsync, Time Machine
- static data that rarely alters, like a collection of media files (video, audio)
- frequently updated files from applications, like Surveillance Station
A recycle bin is recommended for folders with:
- user-generated data, like office files
- users’ home folders
Which recycle bin to use
Once you decide to enable a recycle bin, you might have the option to use either the shared folder bin or the team folder bin.
Note that the team folder bin requires Synology Drive. Its recycle bin only works with team folders that have versioning enabled. In that case, I suggest enabling the recycle bin in Synology Drive and disabling it for the shared folder in Control Panel.
In all other scenarios, use the shared folder bin. For example, you use Synology Drive, but the shared folder is neither a team folder nor a team folder with versioning. Or you do not use Synology Drive.
Shared Folder Bins
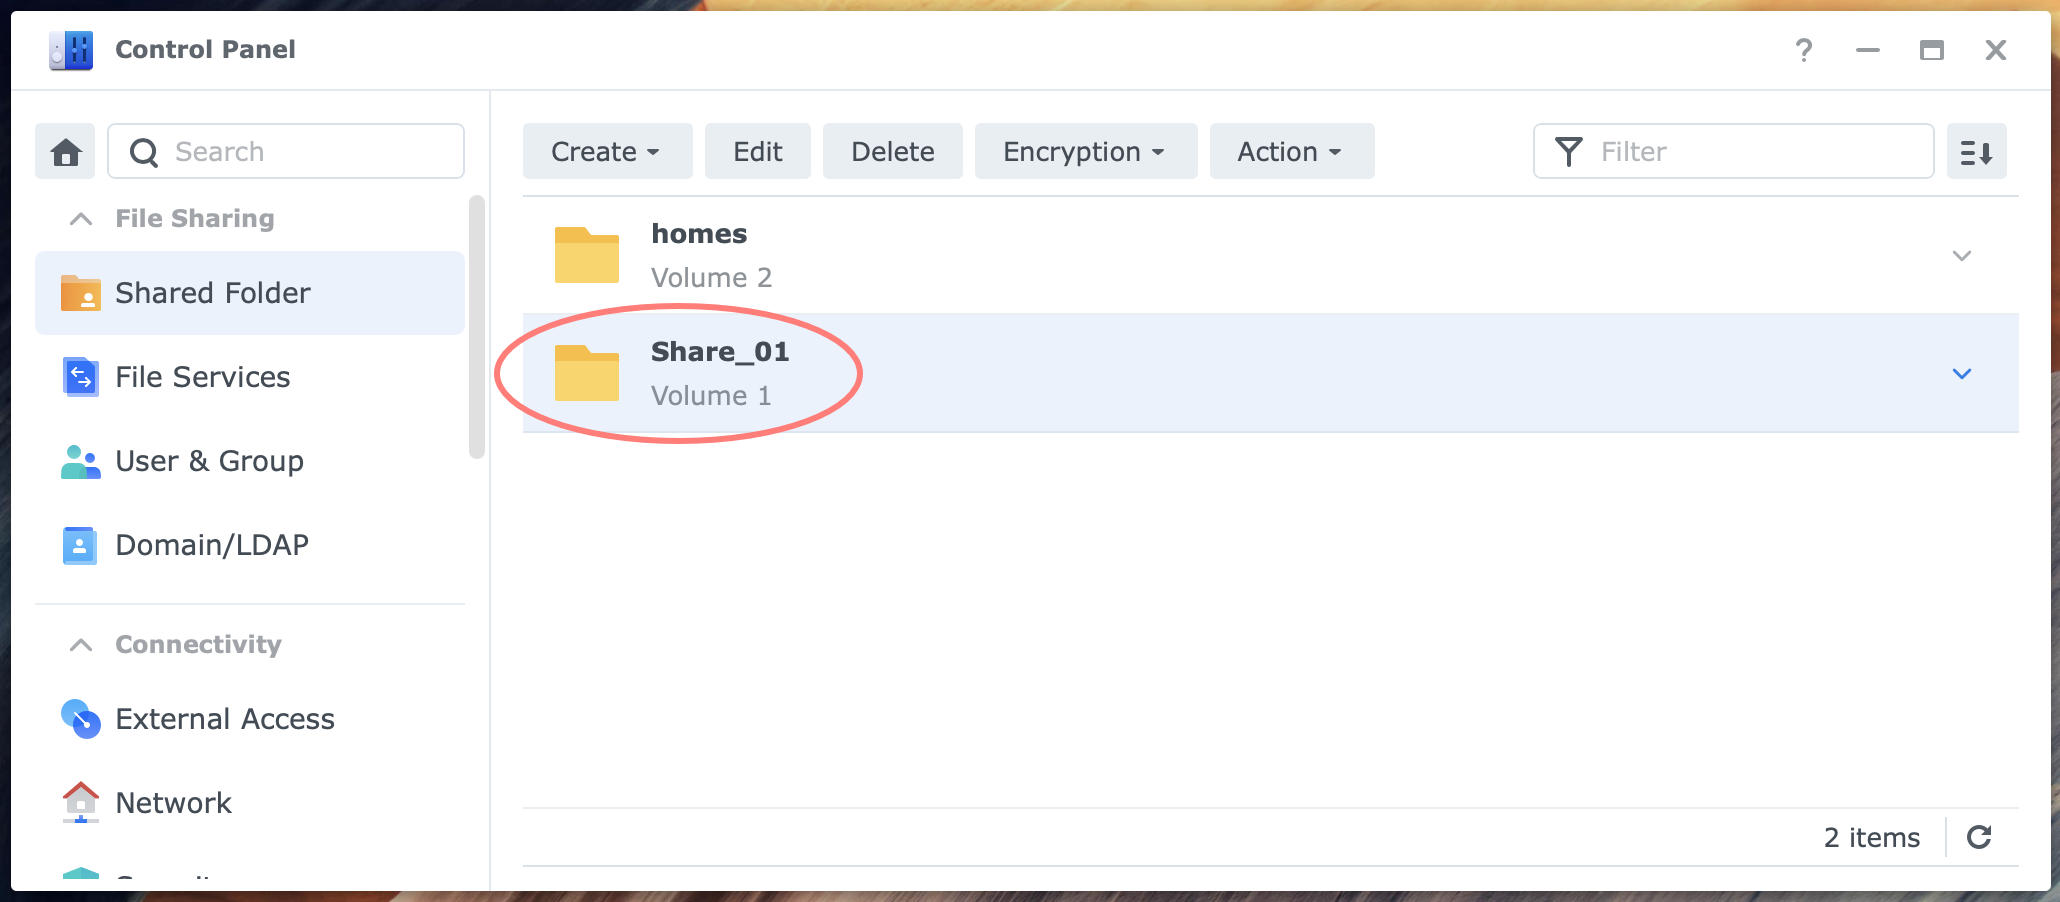
You create and manage shared folders from the Control Panel > Edit shared folder screen > General tab. For details about shared folders, please refer to Using Shared Folders on Synology NAS.
Here you can enable or disable the recycle bin, optionally restrict access to administrators only, and manually empty the bin.
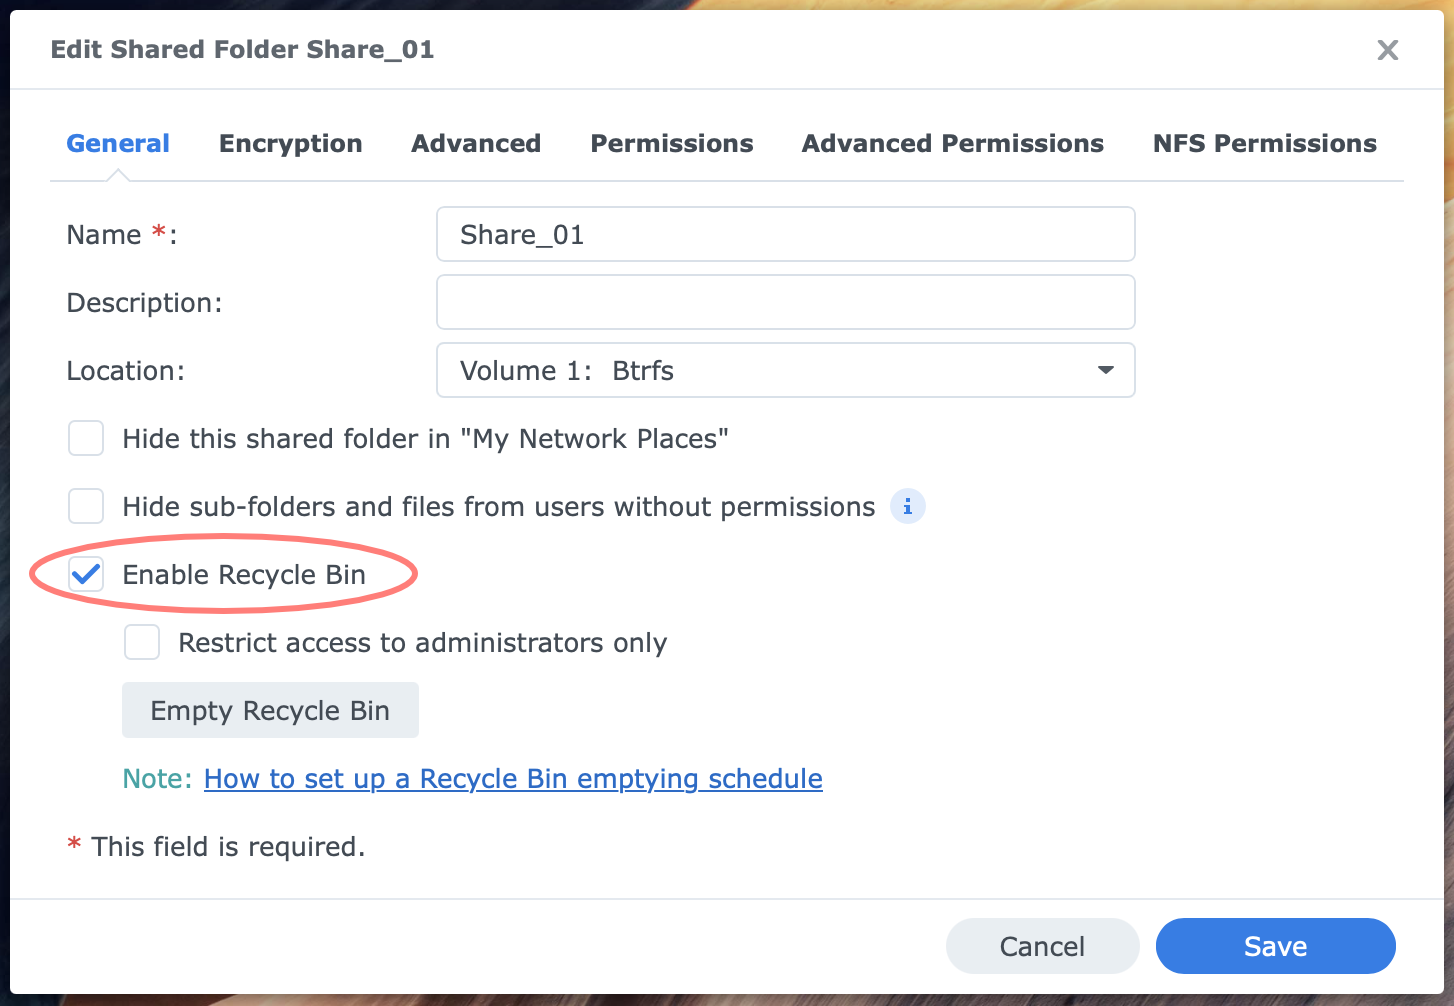
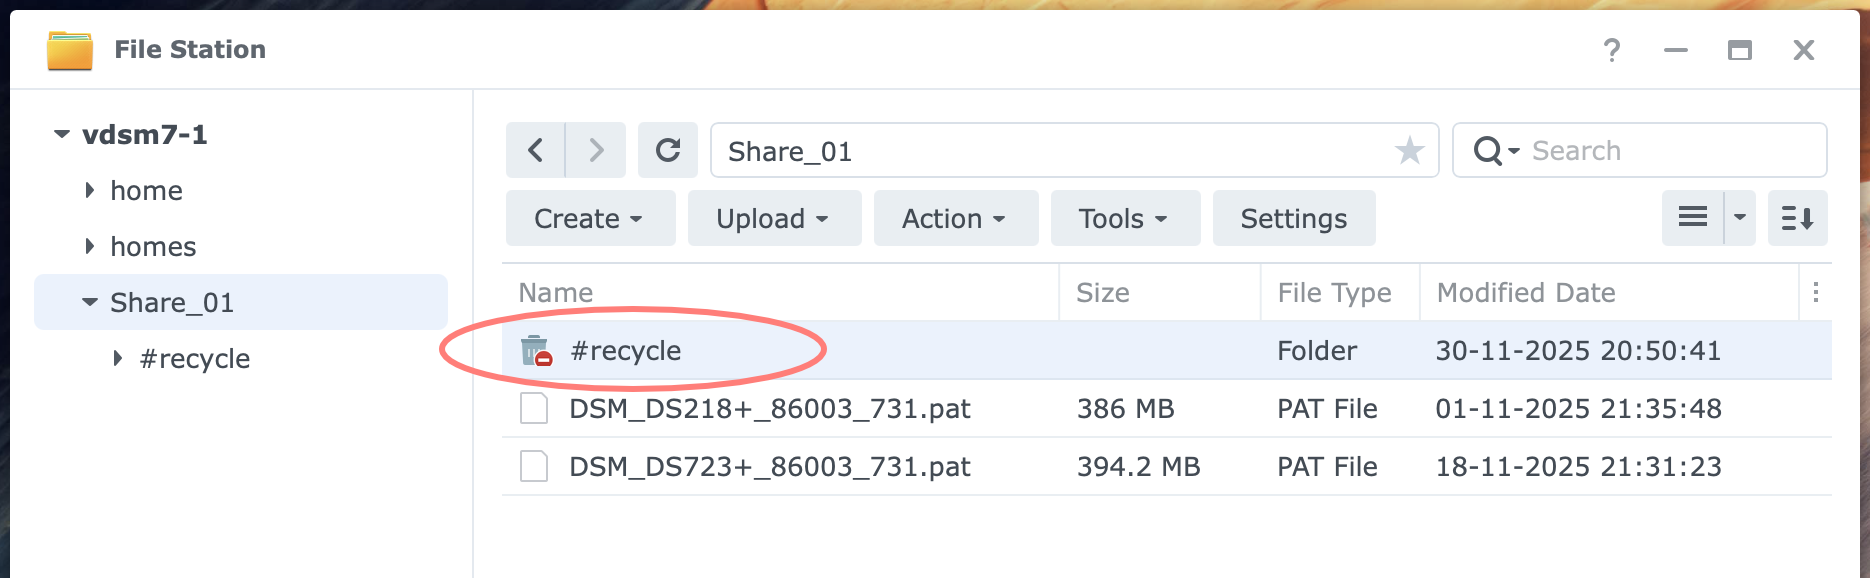
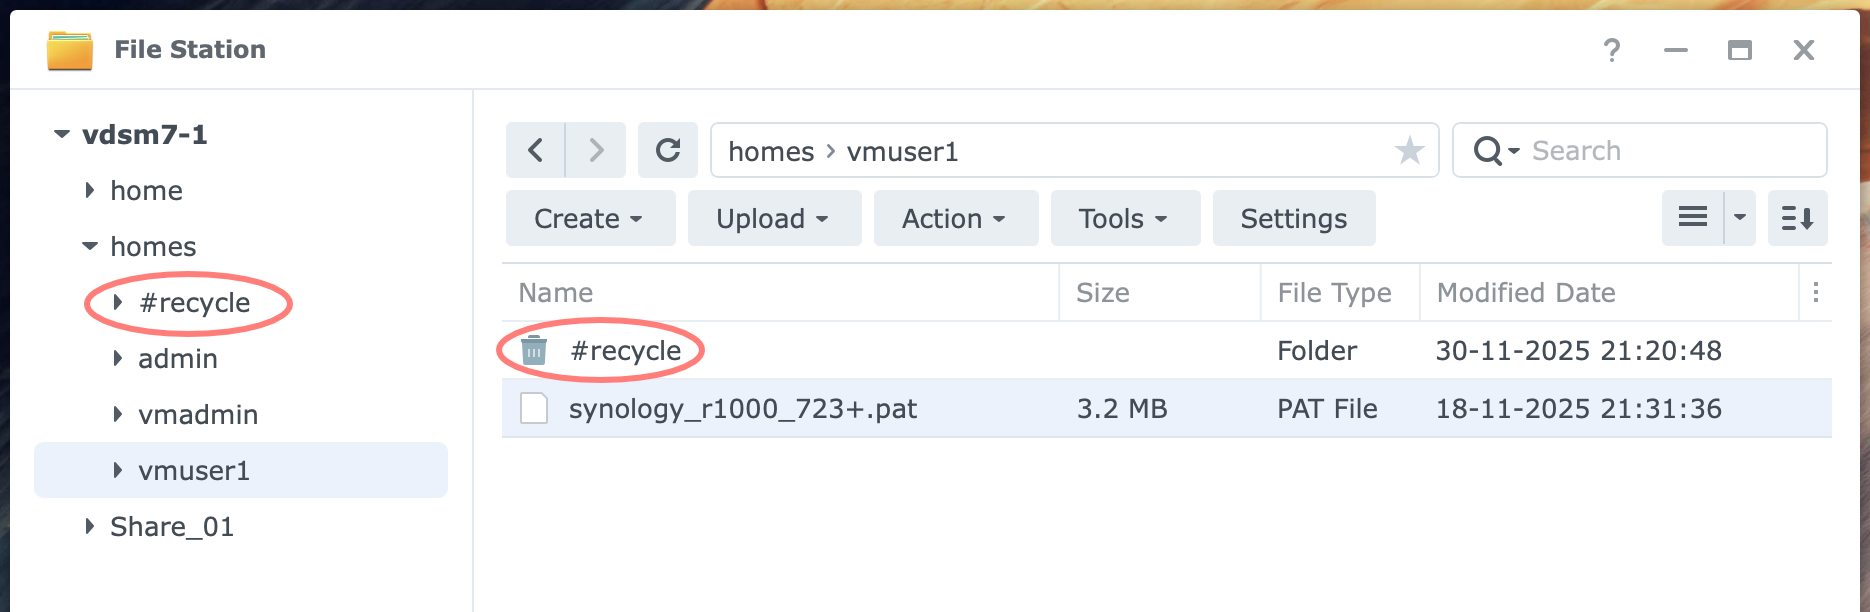
After enabling the bin, a #recycle folder appears in the shared folder.
The /homes shared folder, which contains all users’ home folders, is a special shared folder. See the Home Folder Bins section below for details.
Restoring files from the shared folder bin
The process of restoring files from a shared folder bin is relatively straightforward.
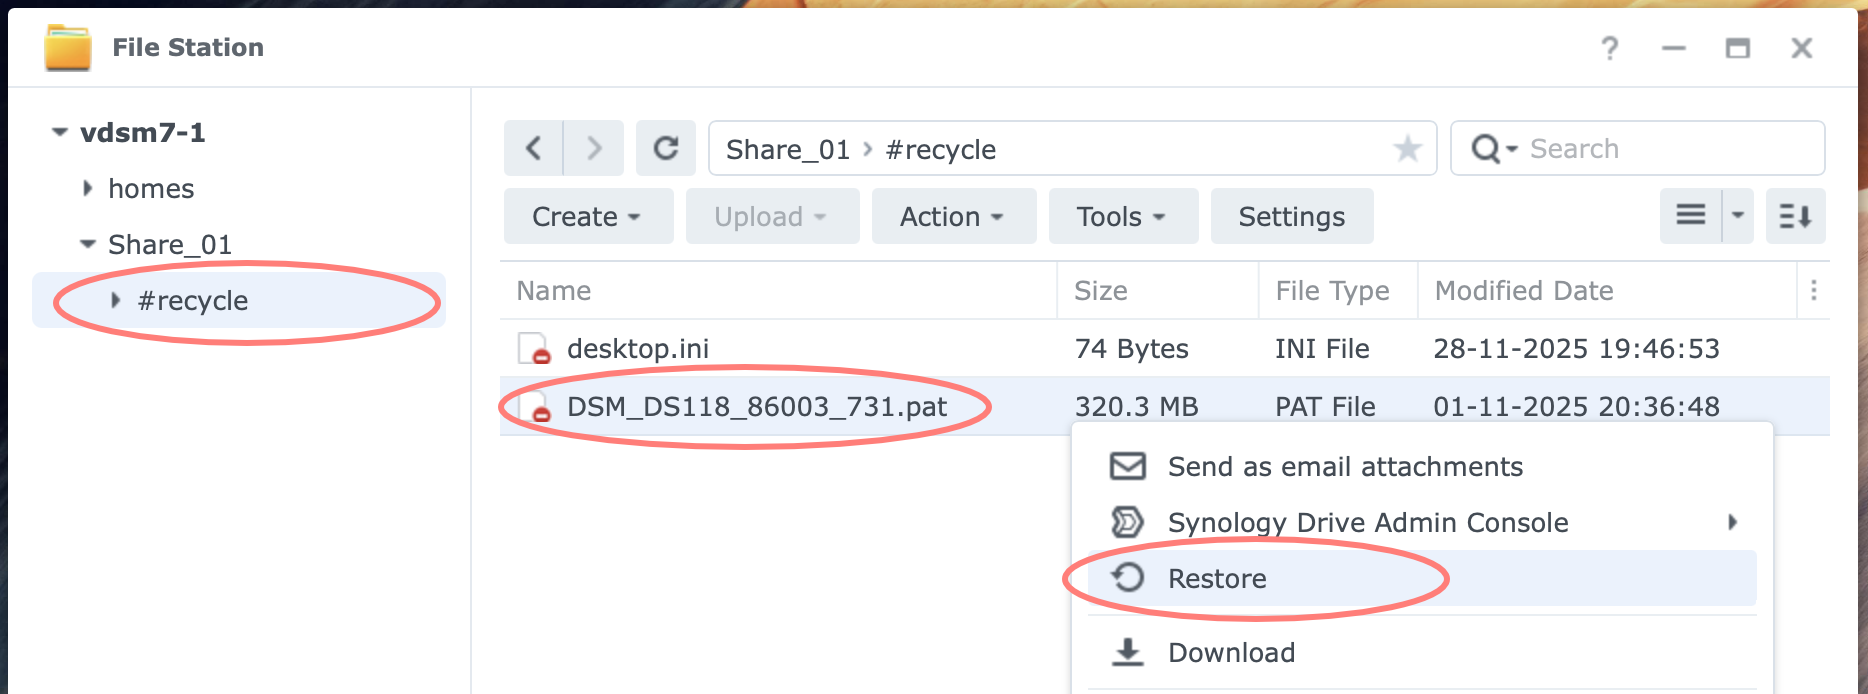
If you use File Station, open the #recycle folder in the shared folder where the deleted file is located. Select one or more files, then right-click or choose Action> Restore. This will instantly move the files from the bin to their original location.
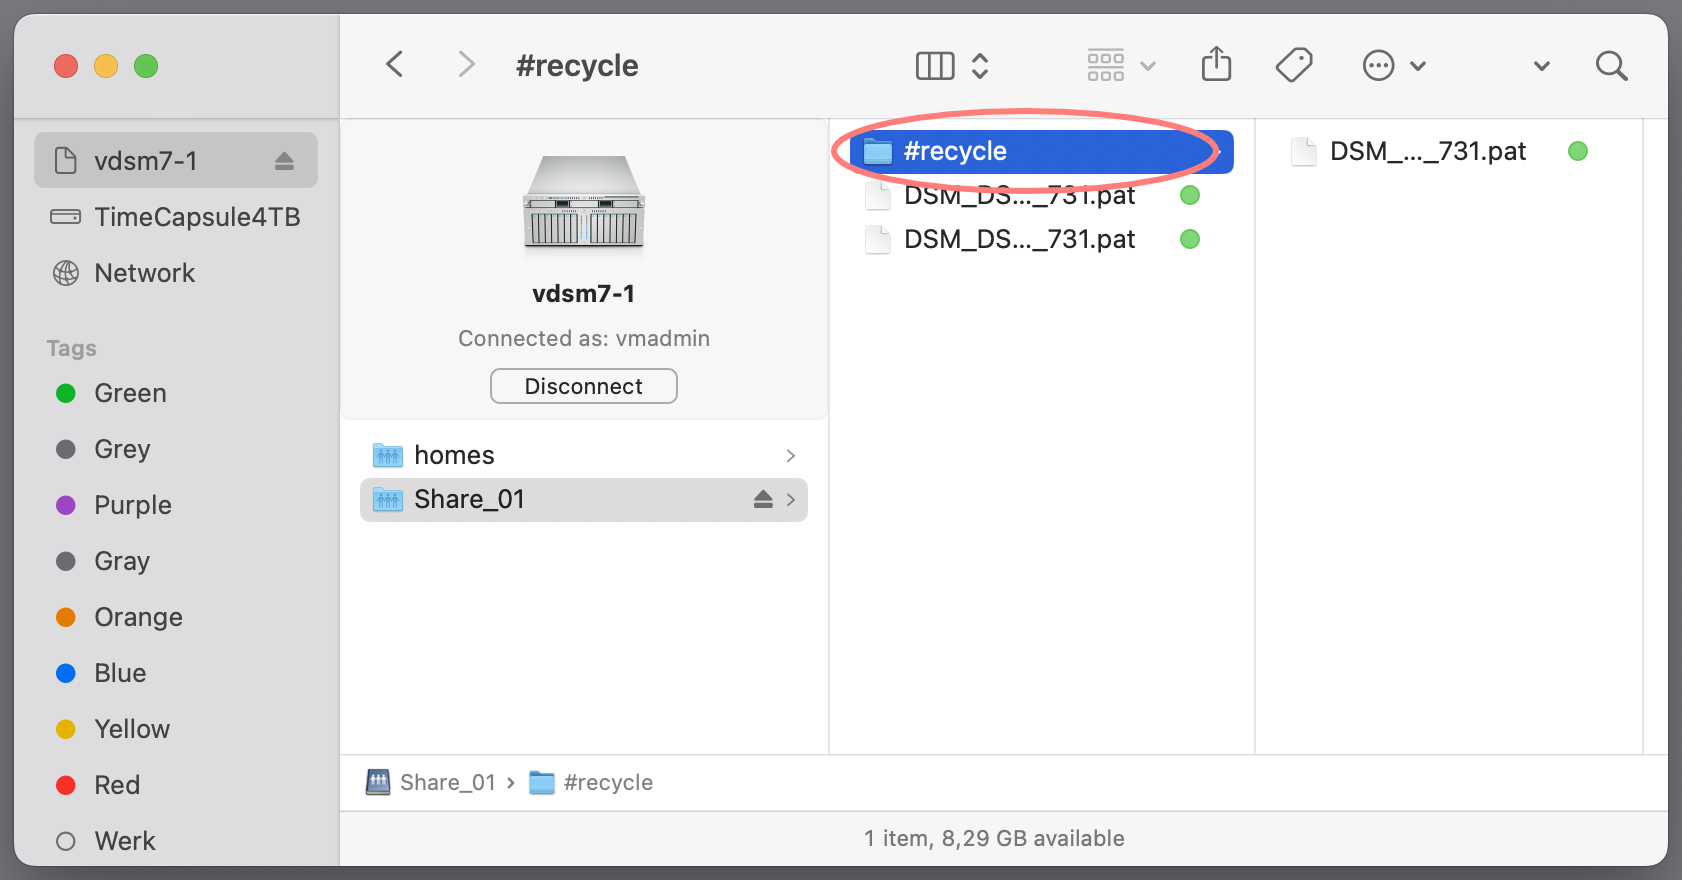
In Finder on macOS or Explorer on Windows, open the #recycle folder, then drag the file(s) to the desired location.
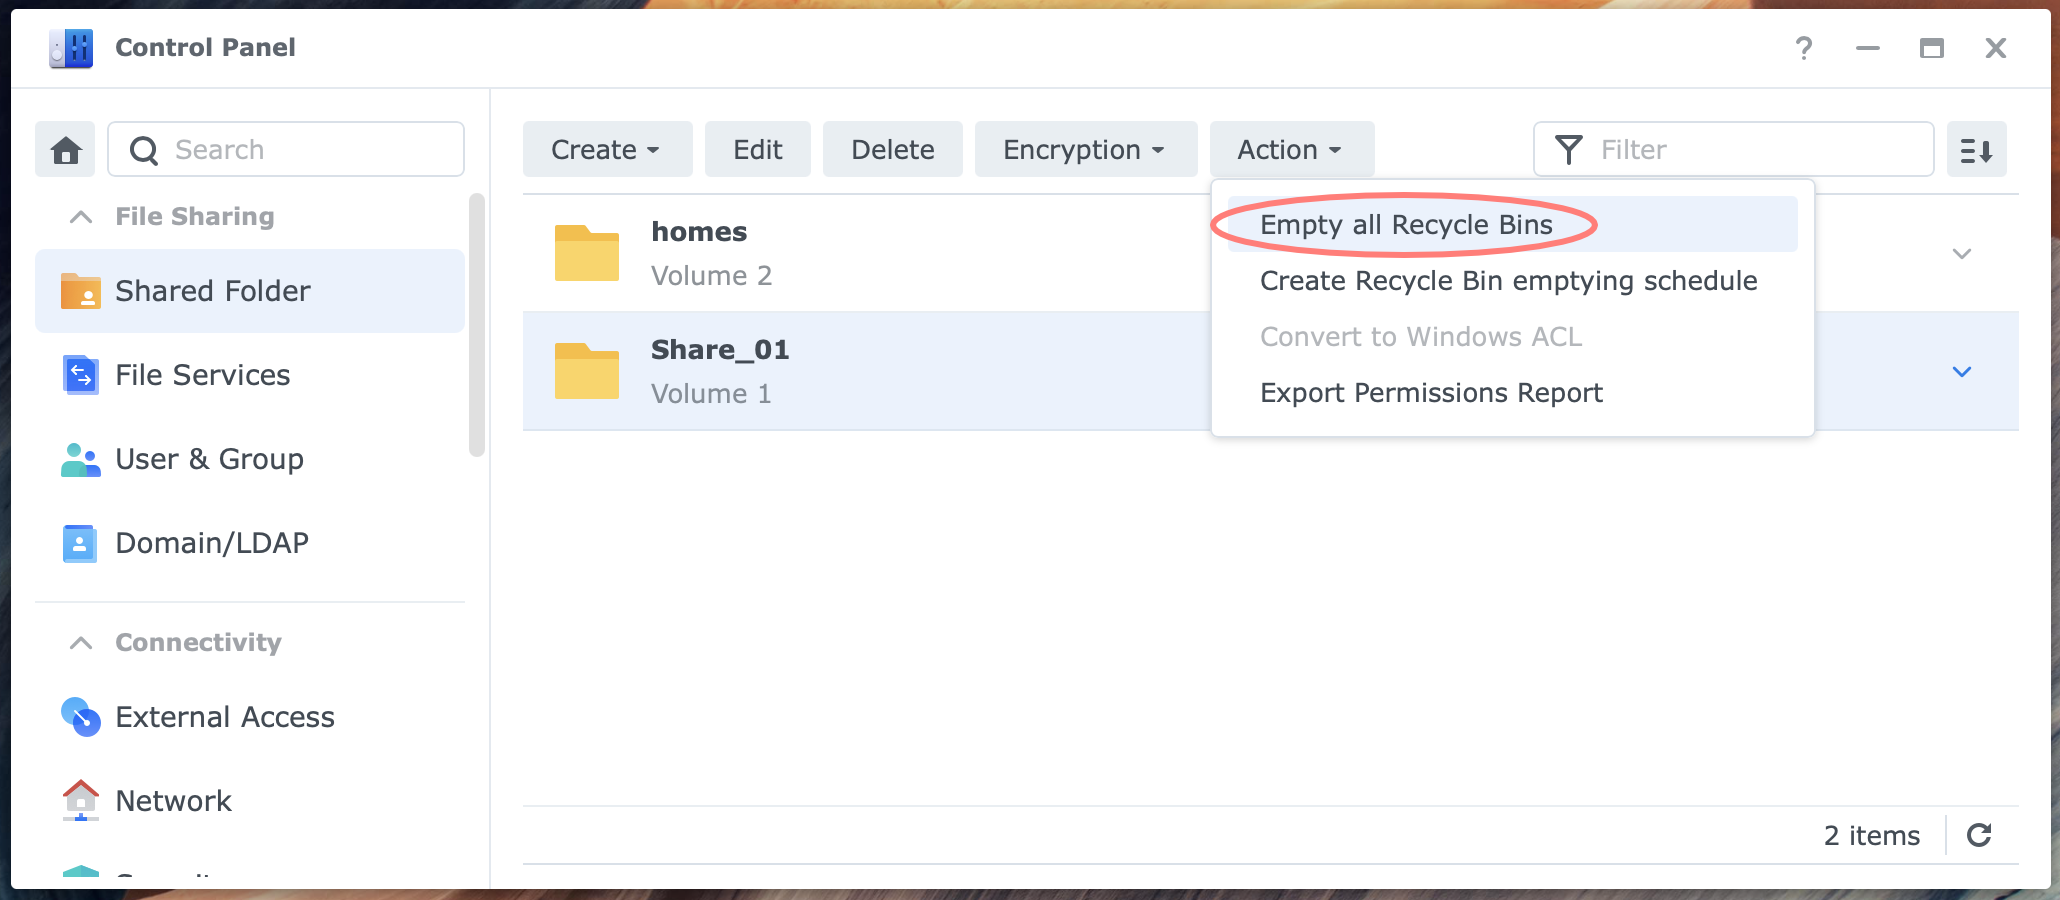
Manually emptying shared folder bins
From the same Control Panel screen, Action button > Empty all Recycle Bins, you can manually empty all recycle bins of all shared folders that have a bin enabled.
This does not affect any team folder bin’s contents, in case they exist.
Automatically empty shared folder bins
Instead of performing this task manually, you can set up a schedule in the Control Panel > Task Scheduler. The task settings let you choose between all recycle bins or from selected shared folders.
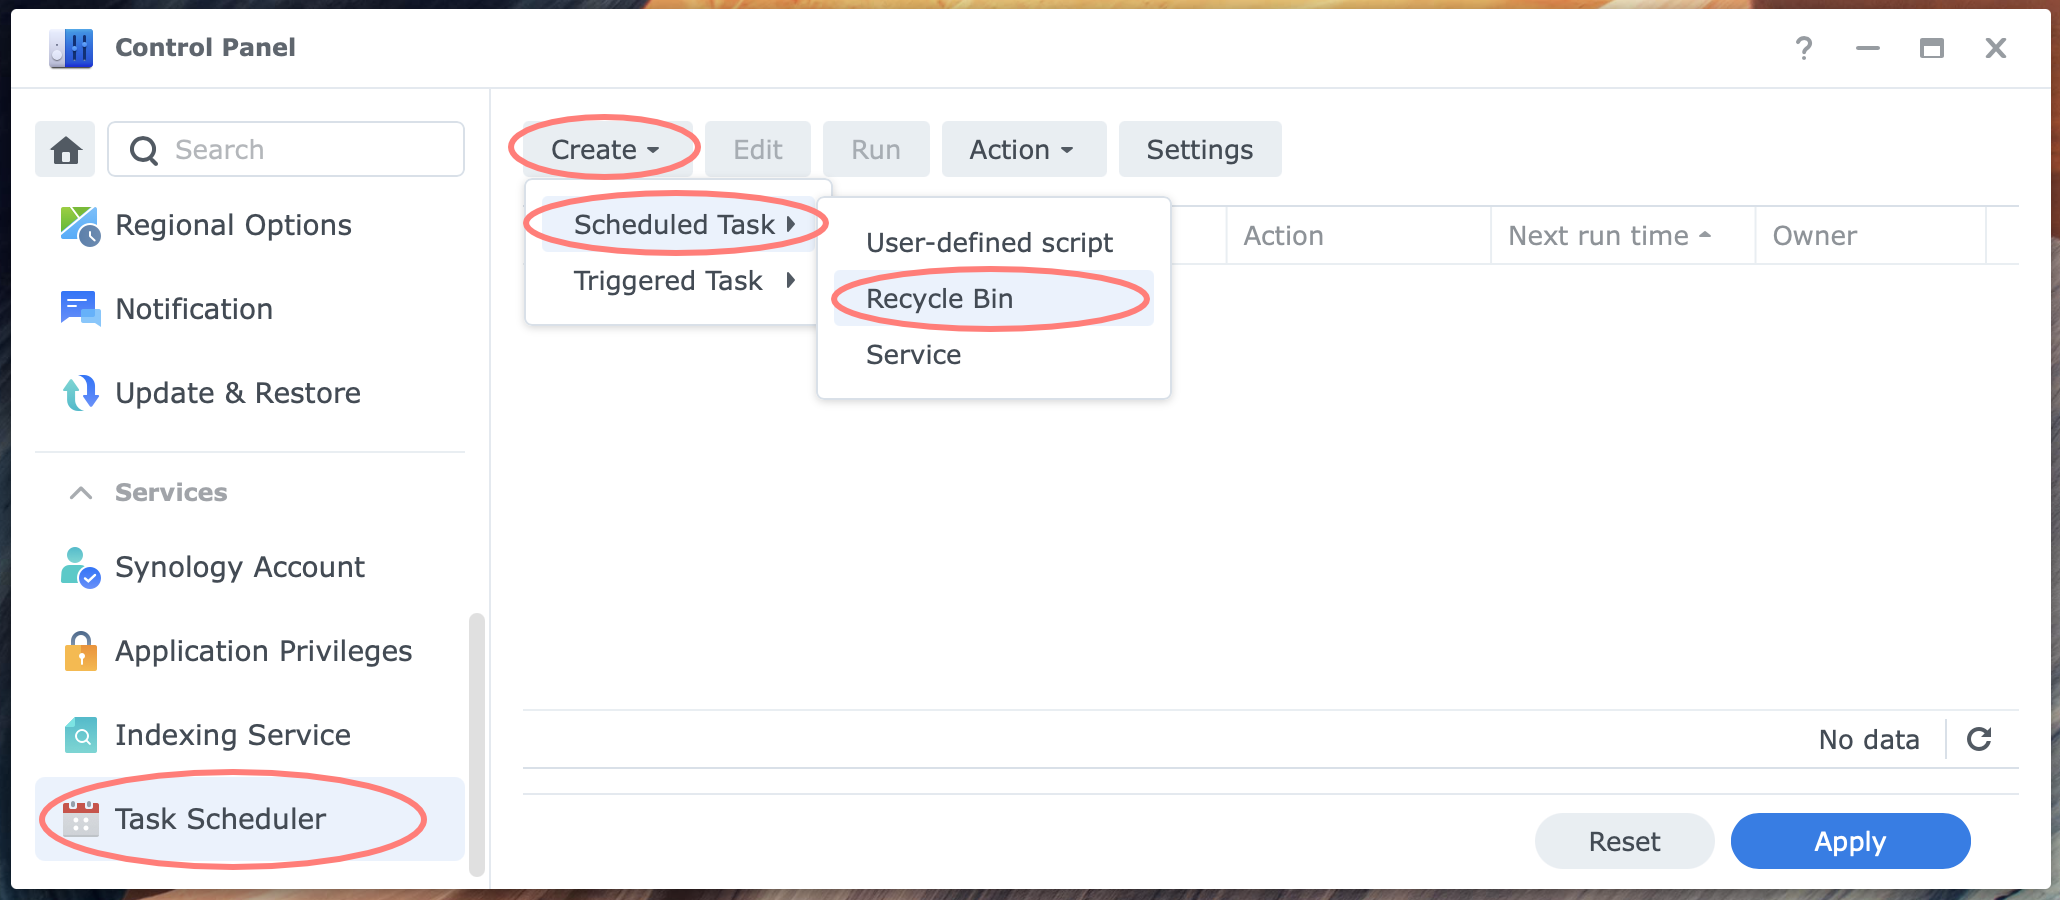
To create this scheduled task, go to the Control Panel > Task Scheduler > Scheduled Task > predefined task: Recycle Bin.
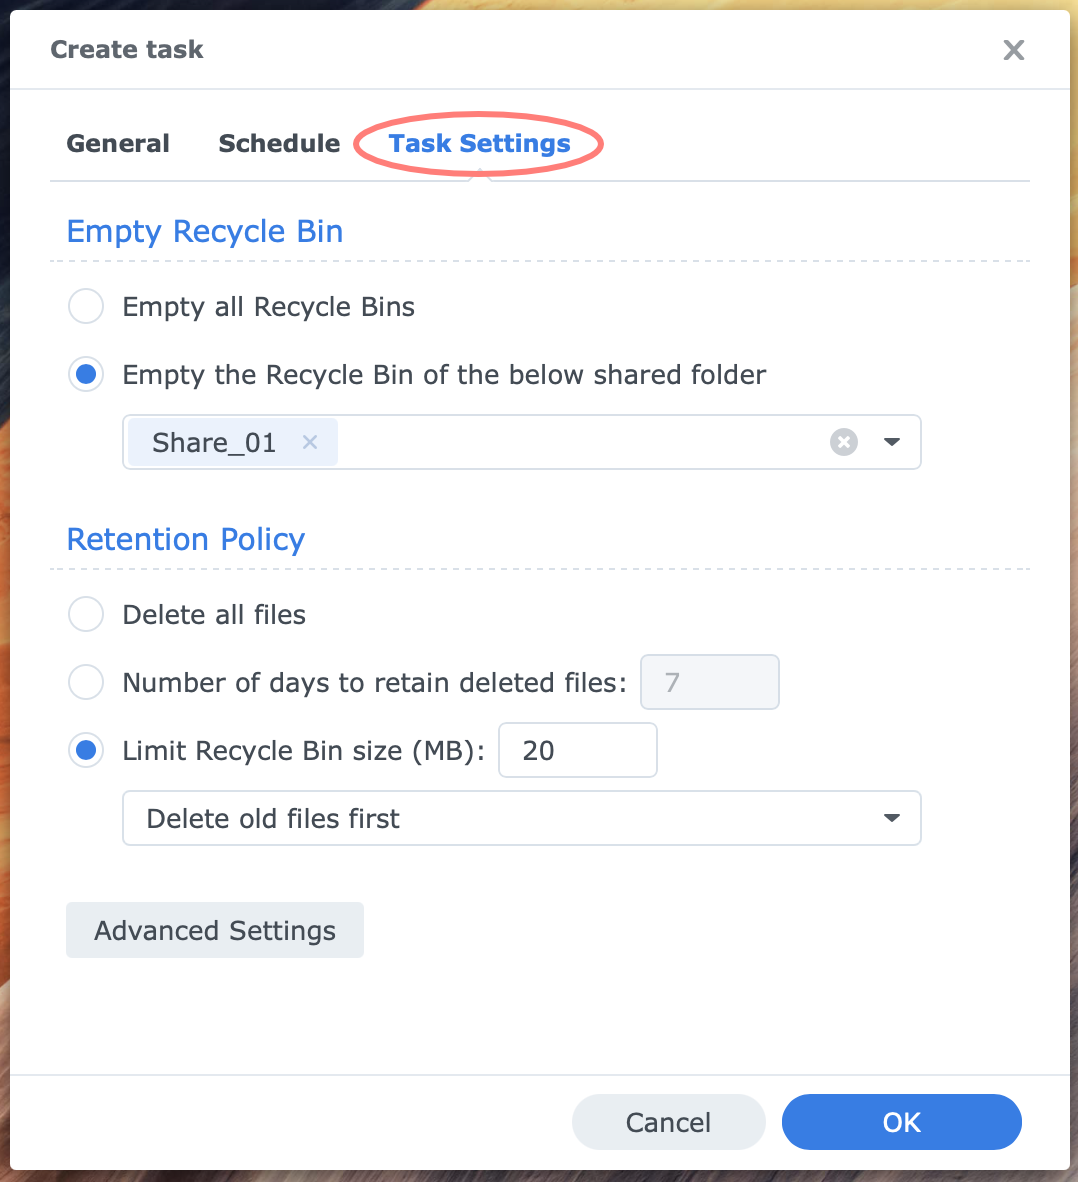
At the Taks Settings tab, under Empty Recycle Bin, you can select to empty all or selected shared folders. With the Retention Policy settings, you can choose to delete all files, delete files older than a certain number of days, or limit the size of the recycle bin and what to do when the threshold is reached: delete the largest or oldest first.
Behind the Advanced Settings button, you define what to keep: specific file extensions, specific size (x MB or larger or x MB or smaller).
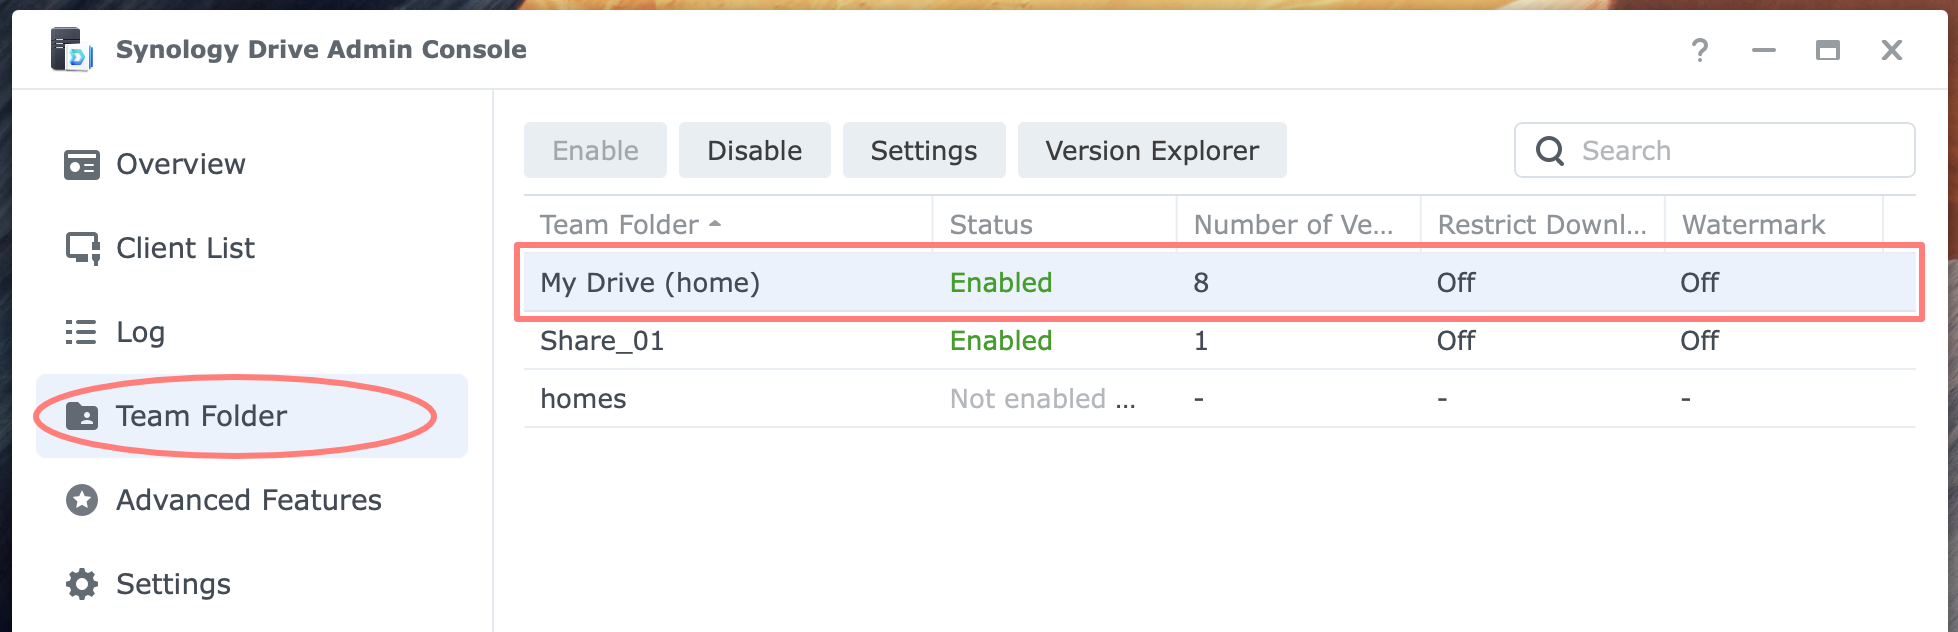
Team Folder Bins
Team folders only exist on a Synology NAS with the Synology Drive Server package installed. If you do not use Synology Drive, skip this chapter, but if you do, please read on.

To enable a team folder bin, you need to:
- enable a team folder
- enable versioning for that team folder

You configure this in Synology Drive Admin Console. A team folder with versioning enabled automatically gets a recycle bin.
Tip
If you would like to use the Synology Drive recycle bin but minimize versioning, set a value of ‘1’ for the number of versions.
Restoring files from the team folder bins
To successfully restore files from a team folder recycle bin, you must meet the following conditions:
- you are a member of the administrators group; standard users do not have access to the recycle bin in the Synology Drive Client, except for the My Drive recycle bin
- you use the Synology Drive web client in a browser
The macOS client does not give access to the recycle bin (at least not that I am aware of).
Emptying team folder bins
From the same Synology Drive Admin Console screen, you can manually empty all recycle bins. Alternatively, the Synology Drive web client offers an Empty Recycle Bin function.
Emptying the team folder’s recycle bin does not affect the contents of any shared folder’s recycle bin, and vice versa. You have to empty both separately to wipe deleted data and free up disk space completely.
You cannot manually empty team folder bins selectively. When scheduled, you can include or exclude team folders from the emptying schedule.
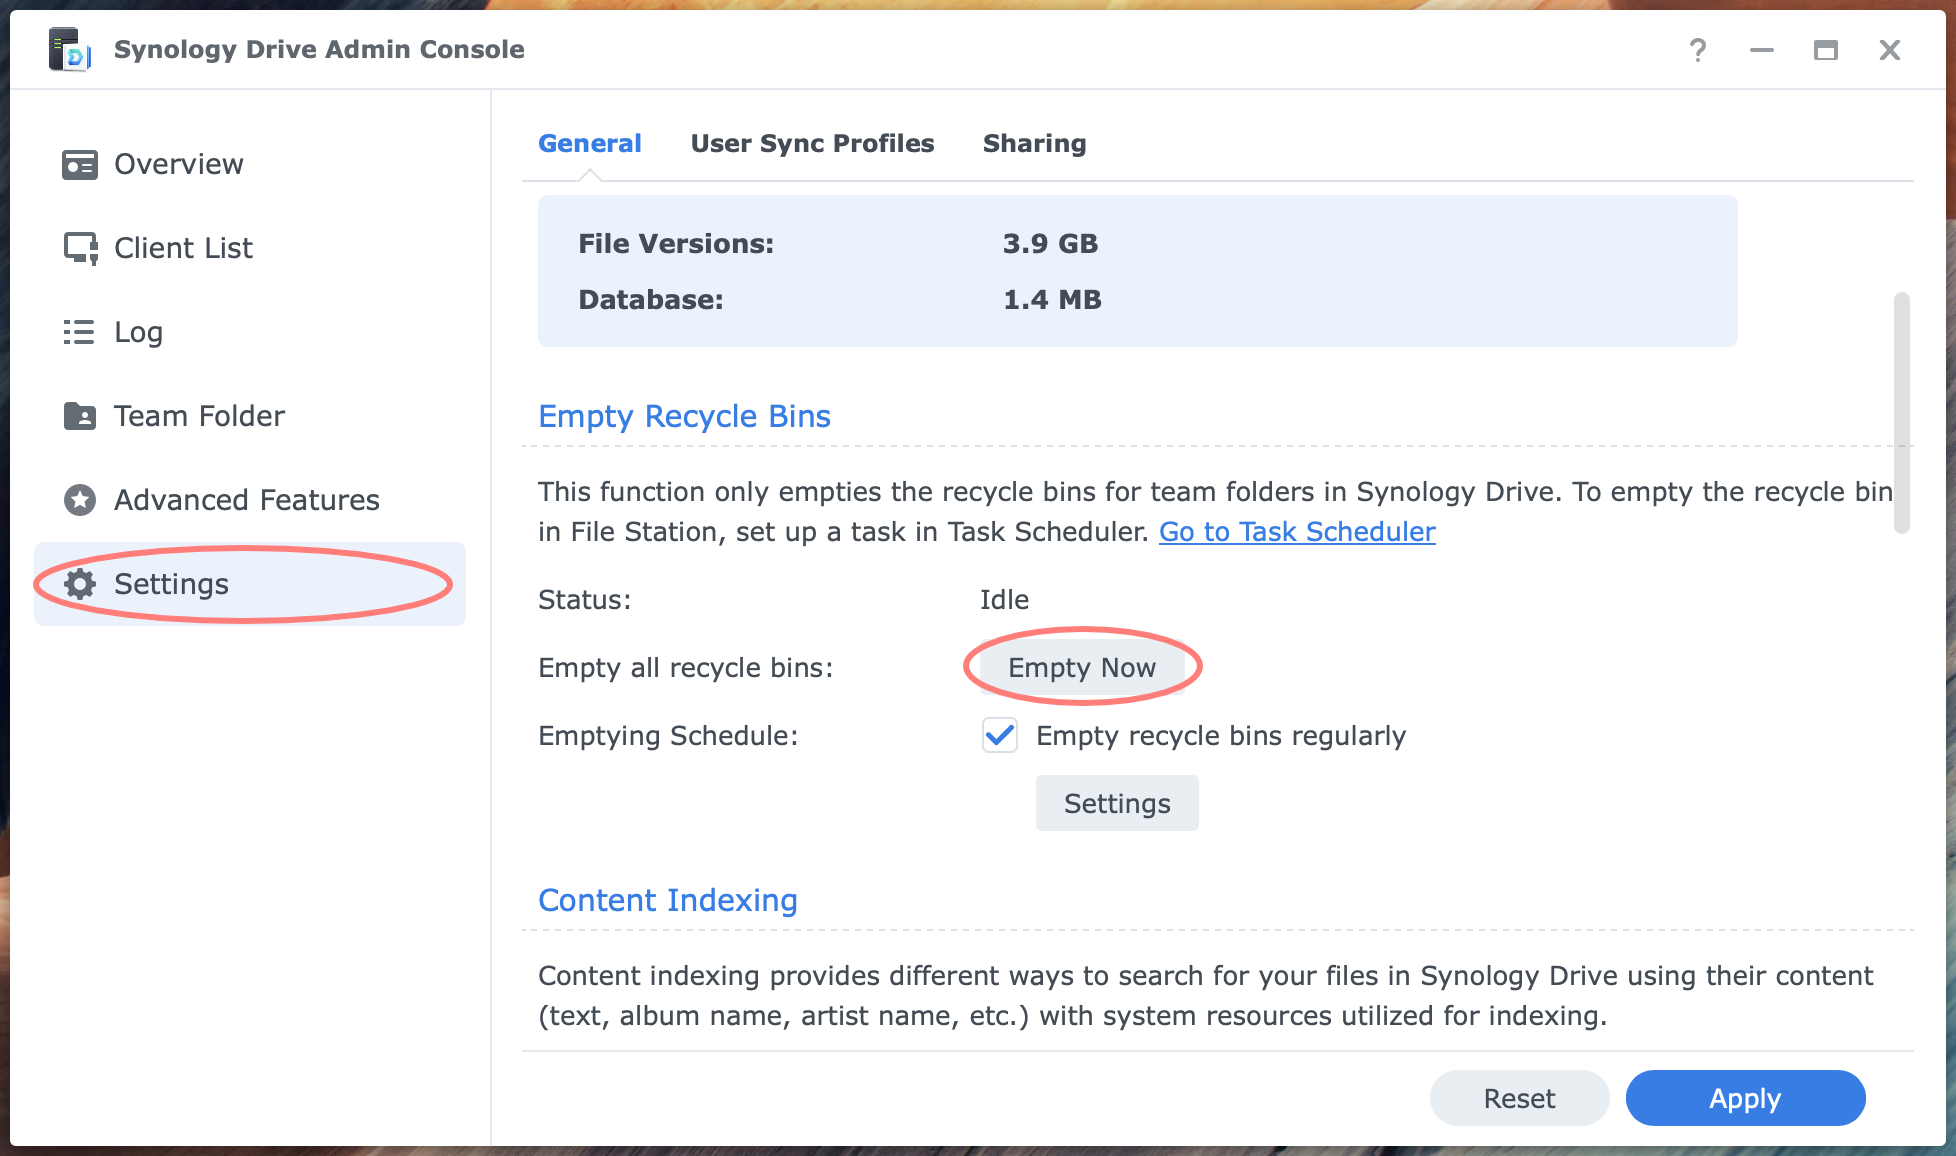
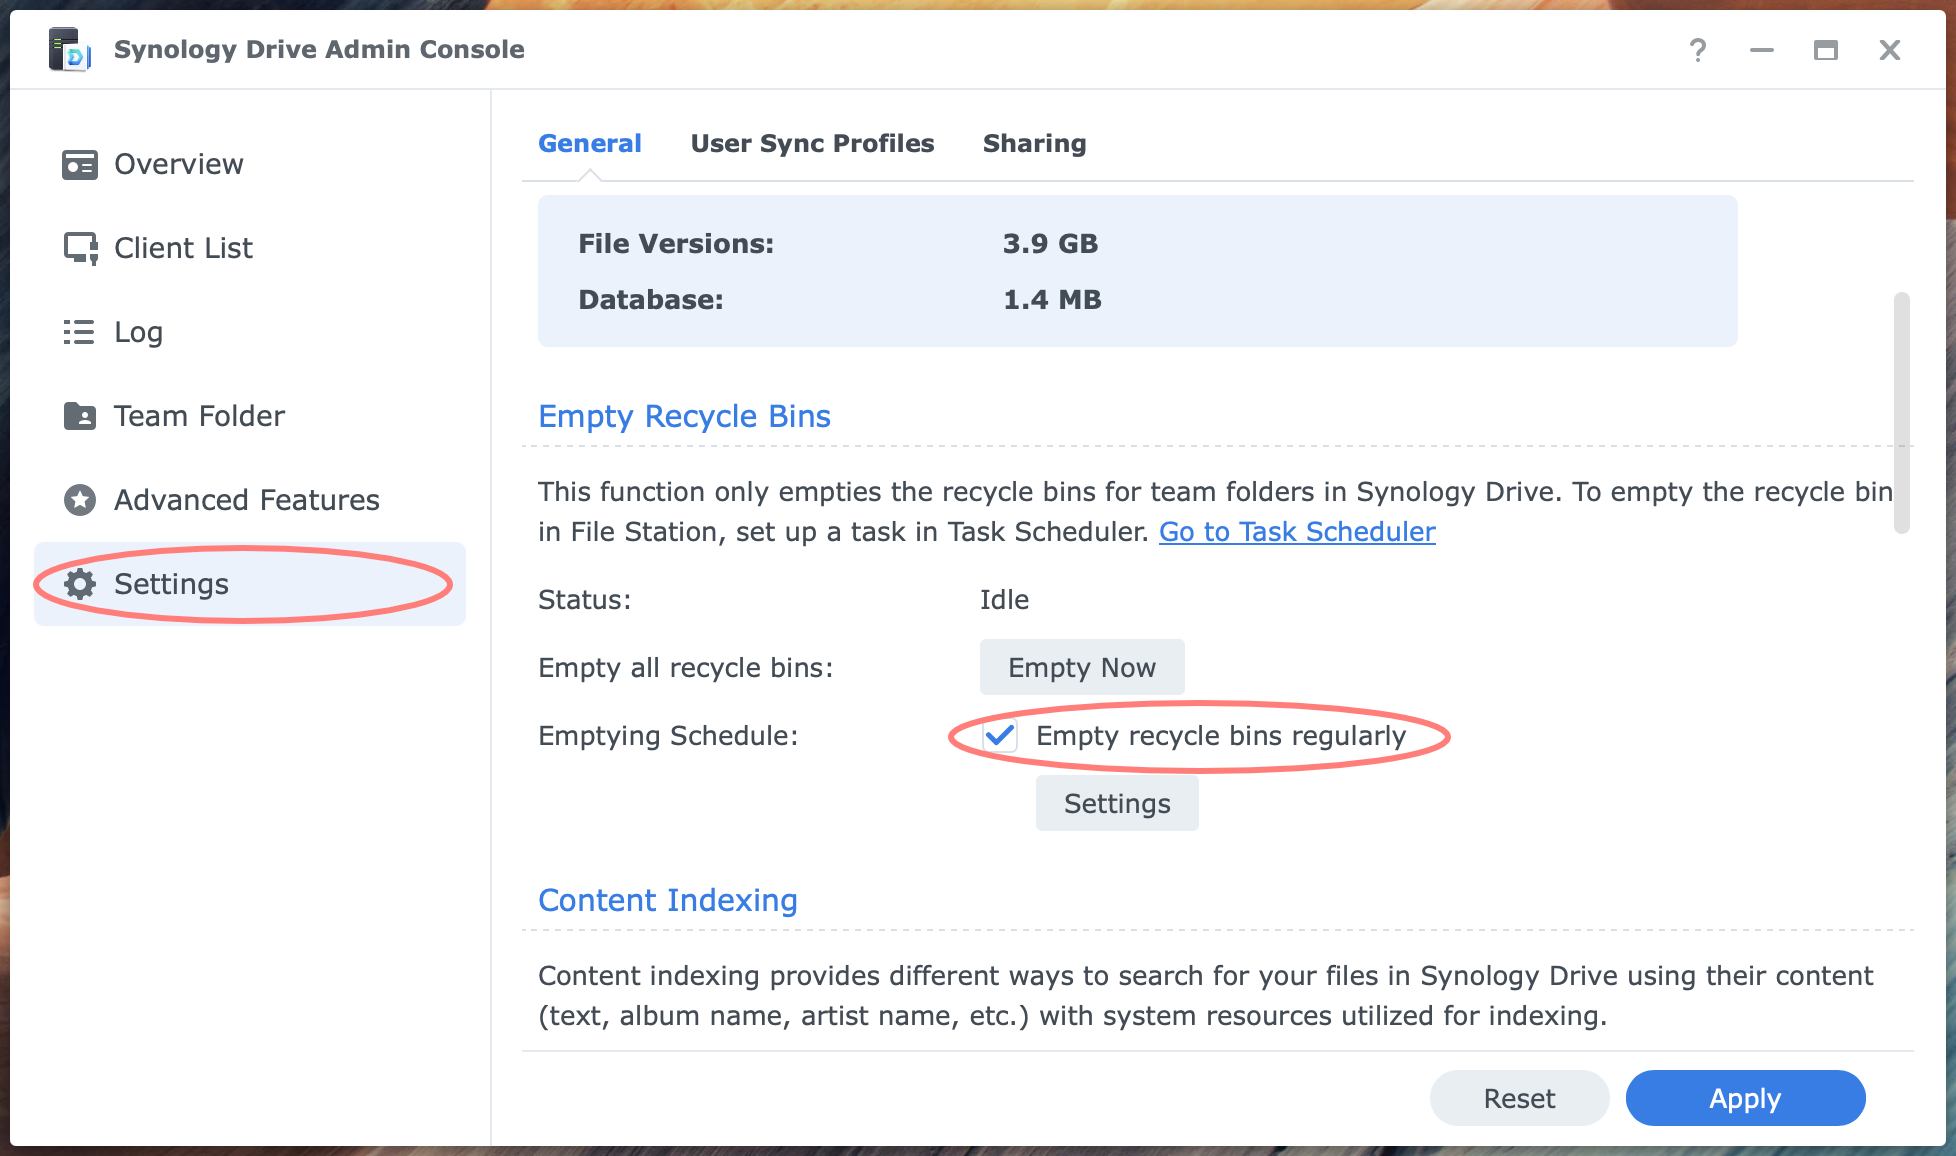
To create a team folder recycle bin emptying schedule, log in to the DSM desktop and open Synology Drive Admin Console > Settings > Empty Recycle Bins section. At the setting Emptying Schedule, enable Empty recycle bins regularly.

This opens the settings dialog or clicks on the Settings button. In the Recycle Bin Emptying Schedule screen, three sections let you meticulously control the schedule for your recycle bins:
- Schedule
- how often should the schedule run
- at what time of day
- Empty Recycle Bin
- which recycle bin is emptied, all or a selection
- Retention Policy
- delete all files or retain deleted files for several days
Note that the settings are similar to those for the shared folder recycle bin schedule discussed above.
Home Folder Bins
When you enable the User Home service on the NAS, it creates the /homes shared folder, which contains all users’ home folders. For details about home folders, please refer to Using Home Folders on Synology NAS.
As for any new shared folder, the recycle bin is disabled by default.
You might want to enable the recycle bin for the /homes shared folder. Because this is a special shared folder, DSM creates a recycle bin in each user’s home folder and the /homes shared folder itself.
In case you use Synology Drive, the user’s home folder is automatically enabled as a team folder named My Drive with versioning. As a result, the recycle bin of Synology Drive is enabled for each user’s home folder.
To avoid using two recycle bins, either enable it for the /homes shared folder or let Synology Drive Server handle it.
Summary And Recommendations
A recycle bin on a Synology NAS is linked to a shared or team folder. Enable a recycle bin when it adds value to the user. If not, don’t.
You need to manage the recycle bin. Create an emptying schedule.
Do not enable a recycle bin for a shared folder and the same team folder. Be aware that a team folder with versioning automatically enables the recycle bin. A best practice is to disable all recycle bins on shared folders as soon as you start using Synology Drive, assuming you make the shared folder with the recycle bin a team folder with versioning.
When combining both recycle bins for both a shared and a team folder, you risk erratic behavior. Deleting a file moves it to both recycle bins. However, when you restore a file from one bin, it does not automatically restore it from the other. The same applies to emptying the bin. You must empty them separately before all is clear and the used space is freed on your volume.
Thanks for reading
This post is donationware, and I made it to help you. Please consider leaving a comment or buying me a coffee if you found it helpful. I will be eternally grateful.
Paul Steunebrink / Storage Alchemist