Primary objective
Learn how to quickly configure email notifications to stay informed about system events and take appropriate measures based on reported events.
Secondary objective(s)
–
Background
A Synology NAS can send you system notifications via email when system status changes, or errors occur. Examples are a failed backup, a failing disk or degraded storage pool, an almost full volume, repeated failed login attempts, and many more events.

These messages help you monitor your Synology and act reactively or proactively to prevent more significant issues.
The steps in this procedure are based on DSM 7 and require a Synology account.
Actions
All steps on the NAS require logging in to the DSM desktop with an administrator account.
There are six steps in this procedure.
- Open Control Panel > Synology Account. If you already logged in with your Synology account on the NAS, skip this step and continue with the next. If you are not logged in, use your Synology account to log in.
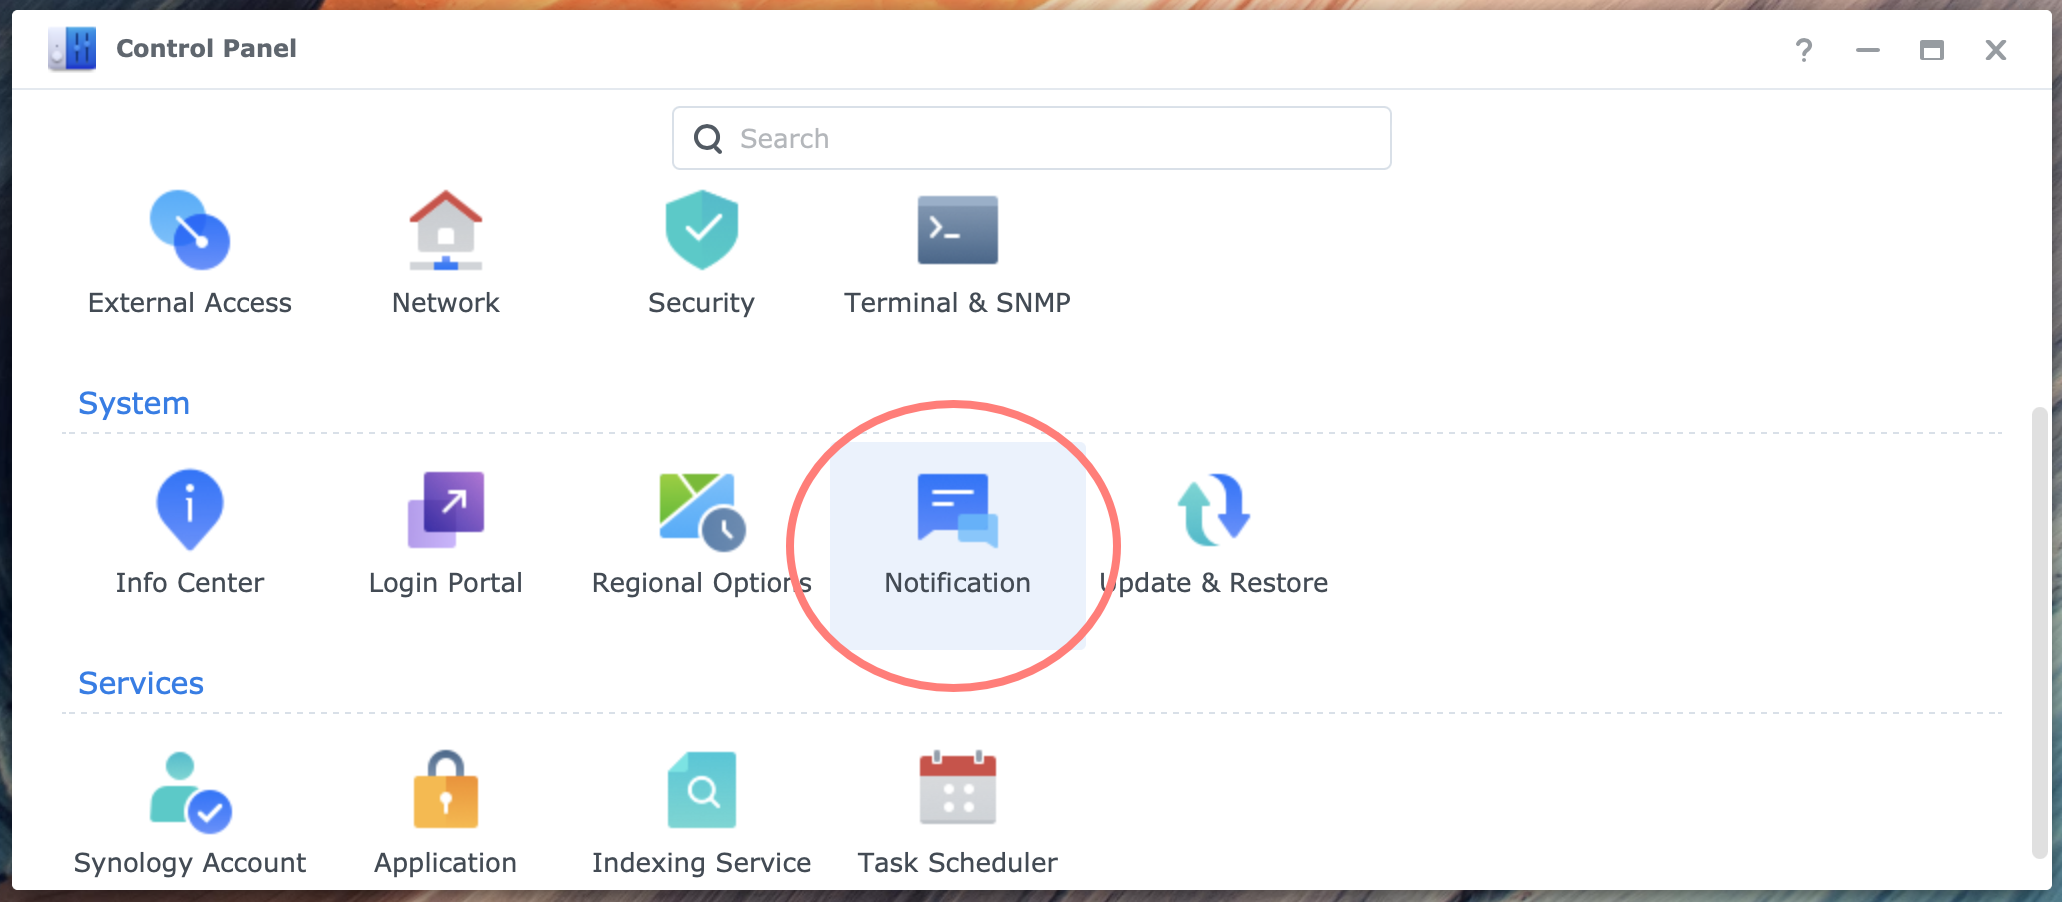
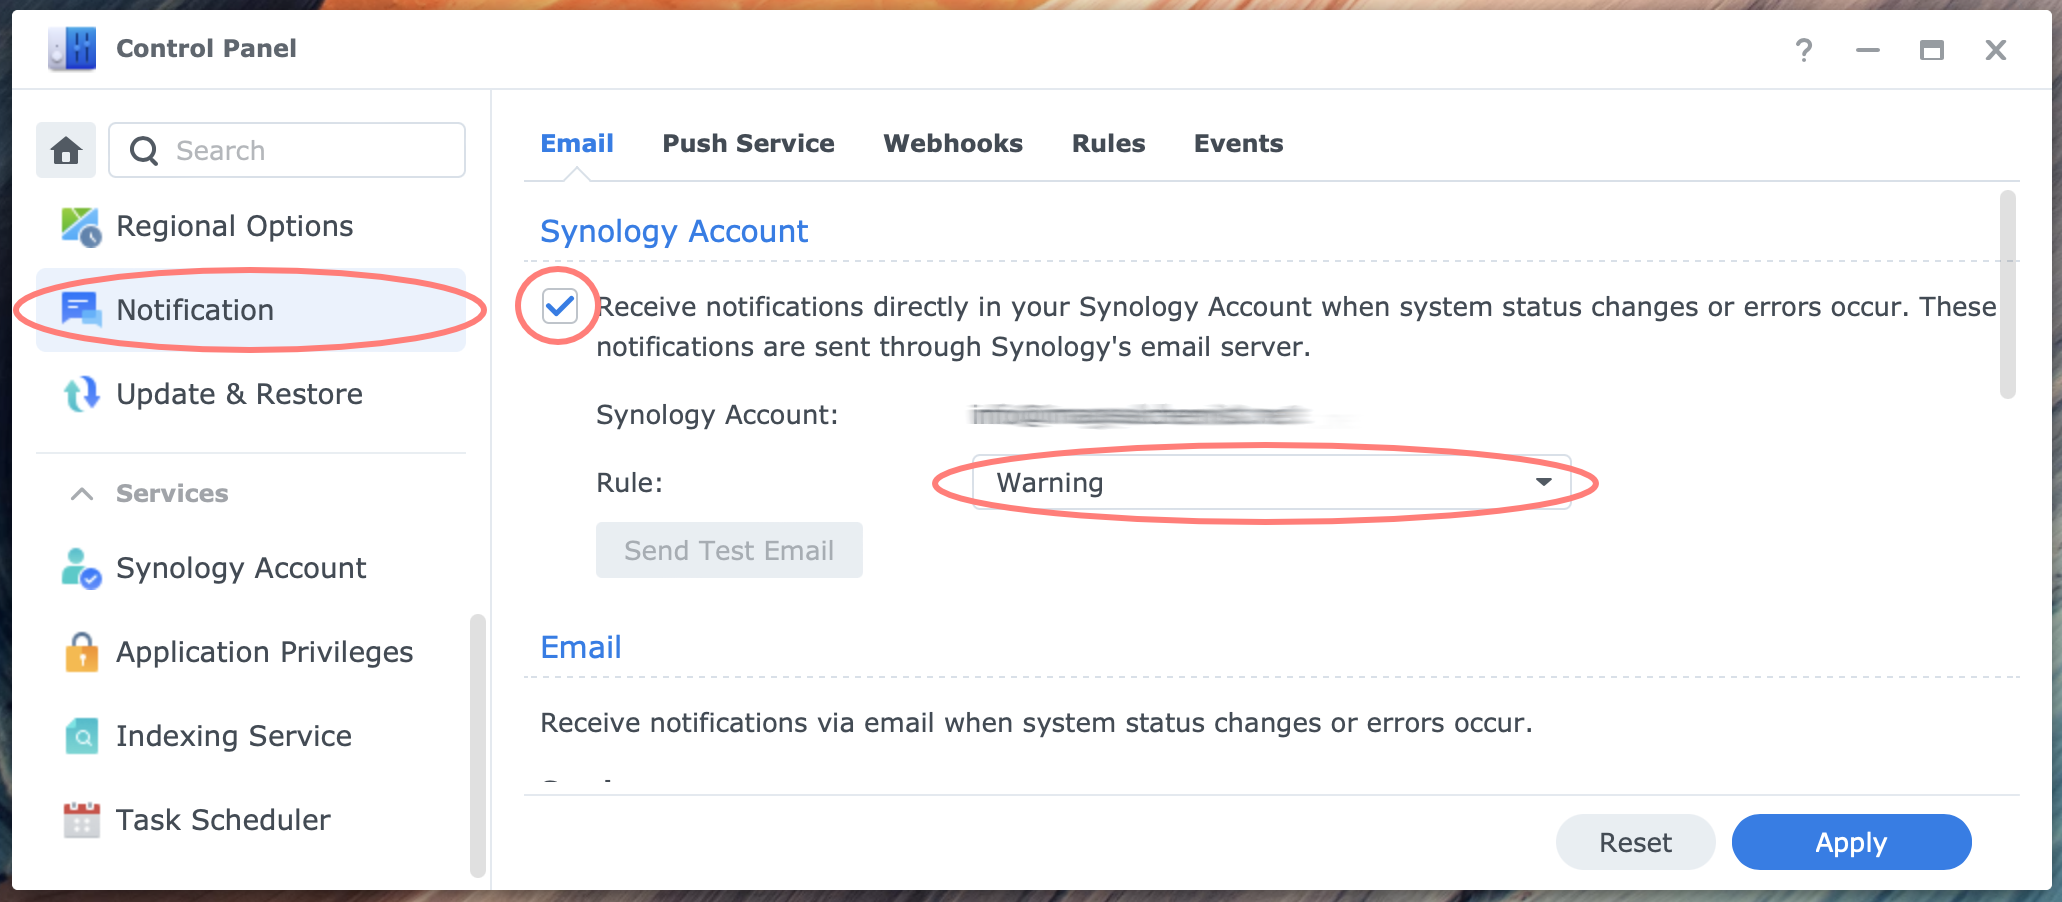
- Open Control Panel > Notification > Email tab > Synology Account section. Enable Receive notifications directly in your Synology Account…
- Choose the Rule – All, Warning, Critical – and click Apply.
- Click the Send Test Email button.
- Open your mail application and check the email account you use for your Synology account for the test mail. Click on the link to activate the service.
- Log out of the DSM desktop or continue with the second procedure.
Congrats, you achieved the primary objective.
Thanks for reading
This post is donation-ware, and I made it to help you. Please consider leaving a comment or even buying me a coffee if it did. I will be eternally grateful.
Paul Steunebrink / Storage Alchemist
