Primary objective
Create a service account to run a service on your Synology NAS.
Secondary objective(s)
When you create a service account, you improve the system’s safety and the service’s stability.
Background
Some services on your NAS, typically backup services, need a user account to log in to the destination NAS.
Although it is common to use an account for one of the users, it is preferred to tailor a dedicated user account for the task: a service account.
A service account starts as a regular account but with several restrictions and limited permissions necessary for the task. This improves the safety of your system and the stability of the service.
| Service | Account Name | User Group | Folder Permissions | Application Permissions | Quota |
| Active Backup for Business | ab4b-user | users | r/w to ActiveBackupforBusiness | Active Backup for Business Agent | no |
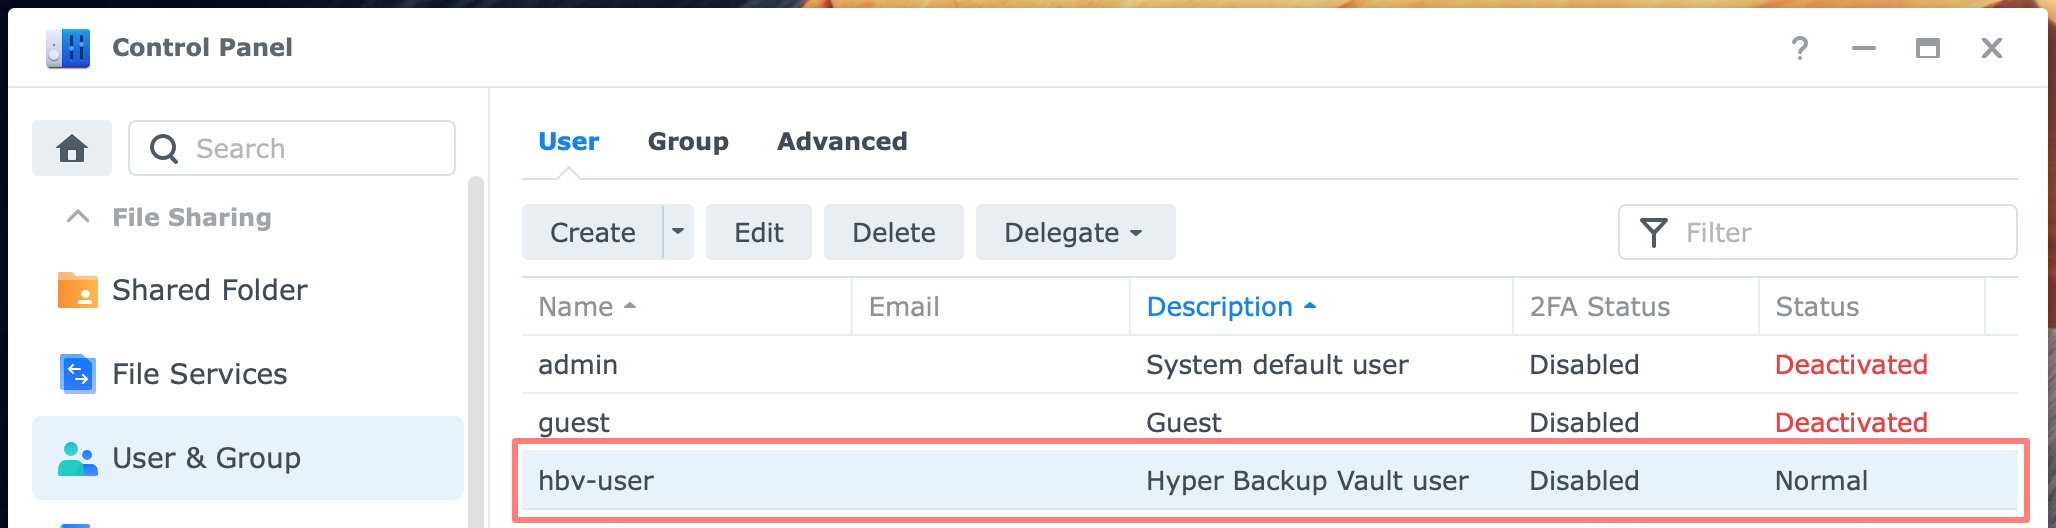
| Hyper Backup Vault | hb-vault-user | users | r/w to the backup folder | Hyper Backup Vault | no |
| Hyper Backup – rsync / rsync (single version) | hb-rsync-user | users | r/w to the backup folder | rsync | no |
| Rsync | rsync-user | users | r/w to NetBackup | rsync | no |
| Shared Folder Sync | sfs-user | administrators | n/a | rsync | n/a |
| Synology Drive ShareSync | sdss-user | administrators | n/a | Synology Drive | n/a |
| Time Machine backup (macOS) | tm-user-mac_name | users | r/w to the backup folder | n/a | yes |
A few notes about the table above.
- the account name is suggested, not mandatory
- the shared folders NetBackup and ActiveBackupforBusinuess are system defaults
- in addition to the AB4B Agent, you might want to give permissions to the AB4B Portal to this account; permissions to the Portal application are required for (NAS) restoration; this may be done with a different account.
- If you have multiple Apple Mac computers, create a tm-user-mac_name account for each computer and assign a quota to each service account. Please reference the tutorial on how to set up Time Machine backup on your Synology NAS.
For help creating user accounts, please reference Better User Management.
Actions
Before we get into action to create a service account, let’s determine a few assumptions first.
- If a service needs a shared folder on the NAS, create that shared folder before you make the service account.
- If a service needs an account with administrator privileges, apply step 4 and skip step 5.
- If a service does not need a user quota, skip step 6. Note that The Assign user quota screen differs for Ext4 and Btrfs volumes.
There are nine steps in the procedure. The steps apply to DSM7.
- Log in to DSM with administrative privileges
- Open Control Panel, User & Group, User tab, and click on the Create button
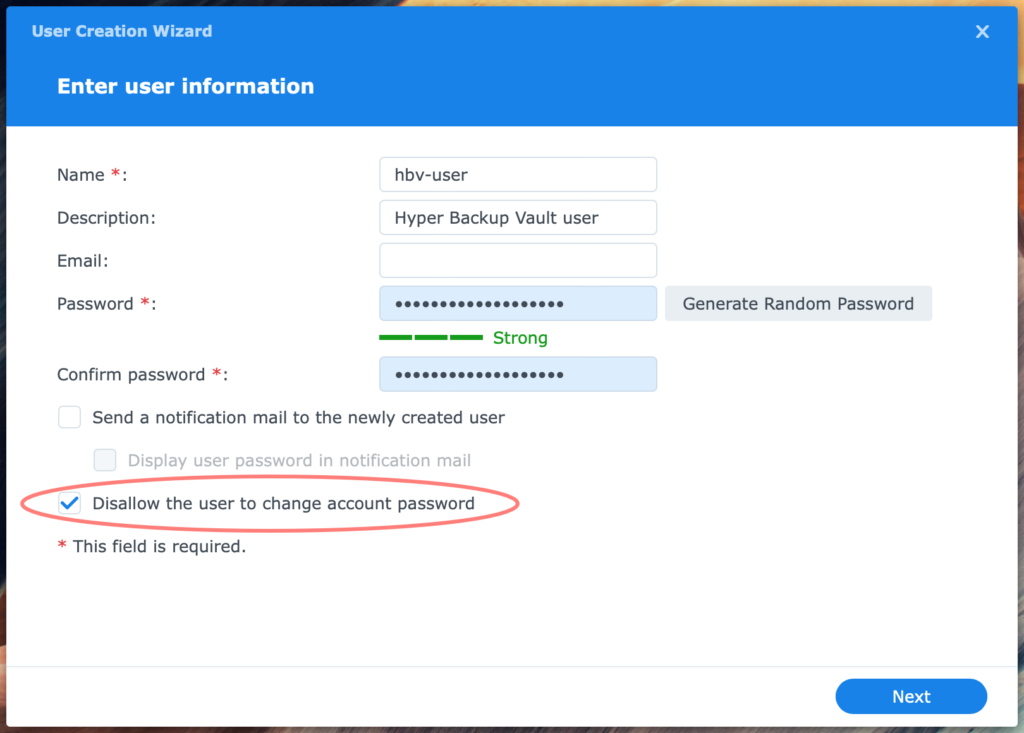
- in the Enter user information screen, fill in name, description, and password; enable Disallow the user to change account password; click Next
- optional: in the Join groups screen, depending on the service you create an account for, enable the administrators group; click Next
- optional: in the Assign shared folder permissions, depending on the service you create an account for, enable Read/Write permissions for the shared folder; click Next
- optional: in the Assign user quota screen, assign a user quota to the volume (Ext4) or the shared folder (Btrfs); click Next
- in the Assign application permissions screen, deny permissions for all services except for the required permission; click Next
- in the User speed limit screen, click Next
- in the Confirm settings screen, review your settings and click Done
Congrats, you just learned how to create a service account and achieved the primary and secondary objectives.
Thanks for reading
This post is donation-ware, and I made it to help you. Please consider leaving a comment or even buying me a coffee if it did. I will be eternally grateful.
Paul Steunebrink / Storage Alchemist